


People invest a lot of effort to dress their windows. It’s perfectly understandable considering the importance of windows in our lives. From one standpoint, they offer a connection to the outside world so our homes don’t feel like entrapments. On the other hand, they serve an aesthetic purpose, providing our homes with natural light and places for decoration.
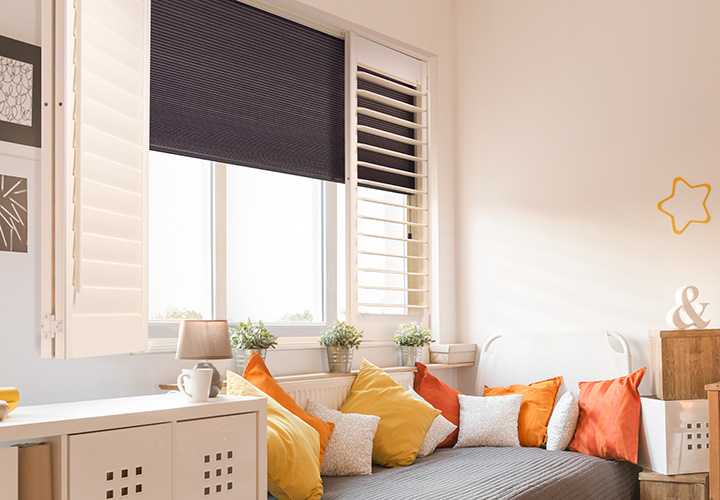
To be able to have privacy and feel comfortable, homeowners use various methods to cover the windows, from shutters to curtains. Roman blinds seem to be trendy now, and rightfully so. They give a polished look to the windows when raised and offer a practical solution to block out the sun while contributing to décor with their colors and patterns.
However, what makes them great is the fact you can make roman blinds yourself without having any previous experience. So, if you are interested in trying this small DIY project, here are a few pointers to do it right and with ease.
#1: Prepare everything you need to make roman blinds
The first line of business should be to choose the fabric for your roman blinds. This is completely up to you since you know best what result you want for your windows. For example, if you want your blinds to keep out as much sun as possible, you will need thicker fabric.
Pay attention to color, textures, and patterns, as well as the type of material since you want something that will go well with the interior design and be easy for maintenance. Also, you need to decide what kind of mechanism you will use to control your roman blinds: a pull cord or sidewinder since they require a slightly different installation.
Here are the basic things you will need for this DIY project:
· Fabric
· Ruler
· Scissors
· Tape measure
· Sewing machine
· Velcro tape
· Pins
· Cord tape
· Pencil
· Blind cord
· 2×1 batten
· Blind rings
· Dowels
#2: Taking measures
Use the tape measure to determine the size of your roman blinds. First, measure the window space where you will install your blinds. Then, take the fabric and mark those window measures, adding 2.5 cm on both top and bottom hems, as well as each seam side. Cut the fabric as marked with scissors to get the base for your roman blinds.
#3: Sewing the seams
Your roman blinds will have a front and backside. The front will face the inside of your home, and the back will face the window. For sewing, you need to place the backside up on the flat surface and iron the hemlines. Then, fold the edges to hide cutting marks and iron over them — this is why you left 2.5 cm when measuring.
Use pins to keep the seams you plan to sew in place and place the back of a Velcro tape on the top seam of your blind. With your sewing machine, sew the marked spots to secure the straight lines and attach the Velcro to your roman blinds. Once you are done, remove the pins and see whether you need to additionally stitch the Velcro tape by hand so it’s firmly attached. This is important since Velcro will hold your fabric to the batten.
#4: Creating dowel pocket
Spread the fabric on the flat surface and start marking spots for inserting dowels. These are rods that will give the pleated effect you so much love on the manufactured roman blinds.
Use a ruler and a pencil to divide fabric into three even horizontal sections. Place a cord tape on each line and sew it on the machine to create dowel pockets. If you are satisfied with the result, proceed to place cord rings on the cord tape and sew them. One ring should be at each end and others placed at 30cm distances.
#5: Attaching the cord
Take the dowels or rods and insert them in the dowel pockets. From the top to bottom, run a blind cord through the cord rings vertically. The cord needs to stay fixed to the rings. To achieve this, tie the cord to the cord ring with a knot and proceed to do the same on the others. This will raise or lower the blinds once they’re installed on the windows.
#6: Hanging the blind on the batten
Take the other Velcro strip and firmly attach it to a batten with glue or use the self-adhesive one. Now, attach your blind Velcro-to-Velcro to the batten. Take four eyelets and screw them to the batten underside, placing the fourth eyelet to the edge from where you will pull the cord.
The cords should go through the eyelets and end on the operating side of the blinds. Cut down the unnecessary cords to create a suitable length so you can fix the blind pull. Install a cleat by the window frame on the operating side so you can neatly tie the cords around it and out of the way.
#7: Keeping your roman blinds clean
It may not look like it, but it’s easy to clean roman blinds and not so different from maintaining other window fabrics. Start with weekly dusting and make sure you sprayed your duster with dust repellant before using it. Afterward, use a vacuum to clean between the folds and remove the persistent dust.
When you choose the fabric for your blinds, opt for the one that can be washed in the machine. While you can remove or leave the cords, make sure to pull out the dowels before placing the blinds in the washer. Use liquid detergent to avoid deposits on the fabric and put either baking soda on the non-greasy stains or store-bought remover for the greasy ones. Taking your roman blinds to professional dry cleaning is also an option, especially if they’re made from fiberglass-blend fabric, wool, linen, and silk.
The bottom line
Having roman blinds on the windows is an elegant way to improve the decor of your home and increase its coziness. As you see, making blinds is not that complicated and requires sewing, measuring, and installing them on the windows with screws and Velcro. If you are not that skillful with tools or your DIY project falls through, you can always find the perfect ones for your home in stores.
People invest a lot of effort to dress their windows. It’s perfectly understandable considering the importance of windows in our lives. From one standpoint, they offer a connection to the outside world so our homes don’t feel like entrapments. On the other hand, they serve an aesthetic purpose, providing our homes with natural light and places for decoration.
To be able to have privacy and feel comfortable, homeowners use various methods to cover the windows, from shutters to curtains. Roman blinds seem to be trendy now, and rightfully so. They give a polished look to the windows when raised and offer a practical solution to block out the sun while contributing to décor with their colors and patterns.
However, what makes them great is the fact you can make roman blinds yourself without having any previous experience. So, if you are interested in trying this small DIY project, here are a few pointers to do it right and with ease.
#1: Prepare everything you need to make roman blinds
The first line of business should be to choose the fabric for your roman blinds. This is completely up to you since you know best what result you want for your windows. For example, if you want your blinds to keep out as much sun as possible, you will need thicker fabric.
Pay attention to color, textures, and patterns, as well as the type of material since you want something that will go well with the interior design and be easy for maintenance. Also, you need to decide what kind of mechanism you will use to control your roman blinds: a pull cord or sidewinder since they require a slightly different installation.
Here are the basic things you will need for this DIY project:
· Fabric
· Ruler
· Scissors
· Tape measure
· Sewing machine
· Velcro tape
· Pins
· Cord tape
· Pencil
· Blind cord
· 2×1 batten
· Blind rings
· Dowels
#2: Taking measures
Use the tape measure to determine the size of your roman blinds. First, measure the window space where you will install your blinds. Then, take the fabric and mark those window measures, adding 2.5 cm on both top and bottom hems, as well as each seam side. Cut the fabric as marked with scissors to get the base for your roman blinds.
#3: Sewing the seams
Your roman blinds will have a front and backside. The front will face the inside of your home, and the back will face the window. For sewing, you need to place the backside up on the flat surface and iron the hemlines. Then, fold the edges to hide cutting marks and iron over them — this is why you left 2.5 cm when measuring.
Use pins to keep the seams you plan to sew in place and place the back of a Velcro tape on the top seam of your blind. With your sewing machine, sew the marked spots to secure the straight lines and attach the Velcro to your roman blinds. Once you are done, remove the pins and see whether you need to additionally stitch the Velcro tape by hand so it’s firmly attached. This is important since Velcro will hold your fabric to the batten.
#4: Creating dowel pockets
Spread the fabric on the flat surface and start marking spots for inserting dowels. These are rods that will give the pleated effect you so much love on the manufactured roman blinds.
Use a ruler and a pencil to divide fabric into three even horizontal sections. Place a cord tape on each line and sew it on the machine to create dowel pockets. If you are satisfied with the result, proceed to place cord rings on the cord tape and sew them. One ring should be at each end and others placed at 30cm distances.
#5: Attaching the cord
Take the dowels or rods and insert them in the dowel pockets. From the top to bottom, run a blind cord through the cord rings vertically. The cord needs to stay fixed to the rings. To achieve this, tie the cord to the cord ring with a knot and proceed to do the same on the others. This will raise or lower the blinds once they’re installed on the windows.
#6: Hanging the blind on the batten
Take the other Velcro strip and firmly attach it to a batten with glue or use the self-adhesive one. Now, attach your blind Velcro-to-Velcro to the batten. Take four eyelets and screw them to the batten underside, placing the fourth eyelet to the edge from where you will pull the cord.
The cords should go through the eyelets and end on the operating side of the blinds. Cut down the unnecessary cords to create a suitable length so you can fix the blind pull. Install a cleat by the window frame on the operating side so you can neatly tie the cords around it and out of the way.
#7: Keeping your roman blinds clean
It may not look like it, but it’s easy to clean roman blinds and not so different from maintaining other window fabrics. Start with weekly dusting and make sure you sprayed your duster with dust repellant before using it. Afterward, use a vacuum to clean between the folds and remove the persistent dust.
When you choose the fabric for your blinds, opt for the one that can be washed in the machine. While you can remove or leave the cords, make sure to pull out the dowels before placing the blinds in the washer. Use liquid detergent to avoid deposits on the fabric and put either baking soda on the non-greasy stains or store-bought remover for the greasy ones. Taking your roman blinds to professional dry cleaning is also an option, especially if they’re made from fiberglass-blend fabric, wool, linen, and silk.
The bottom line
Having roman blinds on the windows is an elegant way to improve the decor of your home and increase its coziness. As you see, making blinds is not that complicated and requires sewing, measuring, and installing them on the windows with screws and Velcro. If you are not that skillful with tools or your DIY project falls through, you can always find the perfect ones for your home in stores.